

How Do You Clean An Aluminum Porch Ceiling?
Porch Ceilings
Looking Great and Maintenance Gratis
Porch ceilings tin be a maintenance issue if y'all select the incorrect textile or if they are not installed properly. Wood ceilings, whether they exist plywood or tongue and groove will require intendance over time.Consider a vinyl ceiling for your porch if you don't desire to spend time maintaining information technology. Bead board ceilings await swell too!
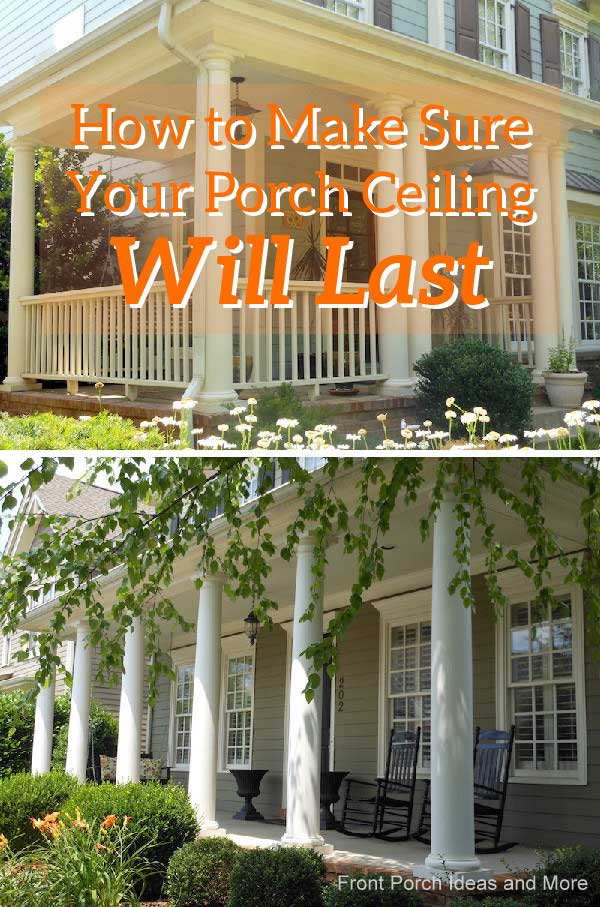
When installing your porch ceiling, pay attending to the details to ensure a longer life
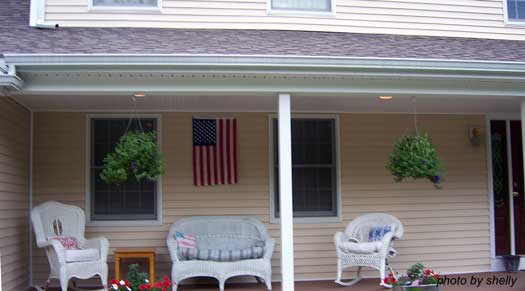
Meet how Shelly, i of our kind readers from Connecticut, transformed her ceiling from the ordinary to the extraordinary. She used vinyl bead board panels along with meticulous craftsmanship to create a long lasting, nearly maintenance free porch ceiling.Shelly writes: "I got hanging baskets for Mother's Day and decided that we should exercise something near the yucky vinyl ceiling the builder put in three years ago before putting holes in for institute hooks. Well, it turned into a complete renovation!"
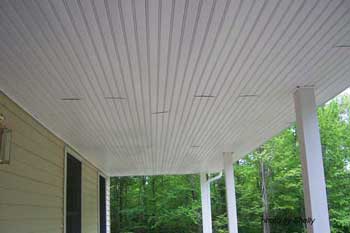
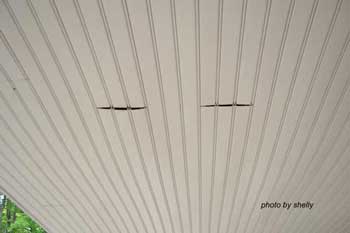
The vinyl had been installed the length of the porch without furring strips for support and the nailing flanges were broken which caused the ceiling to sag and open the butt joints all forth the length of the vinyl.
"Shelly decided that since only well-nigh half the material could be salvaged to run the short way, she'd buy new material (Certainteed Triple-2 ® beaded soffit).
Porch Ceilings Installation Process and Tips
To take the least waste product out of the 12.v ft lengths and add together some visual interest, she decided to box in the existing carrying beam and run the T2 beaded soffit to that, then put vented soffit to lucifer the residue of the house on the overhang.She chose Kleer PVC for the beam as it comes in 18-ft lengths and again would have little waste matter over the 48-foot long run.
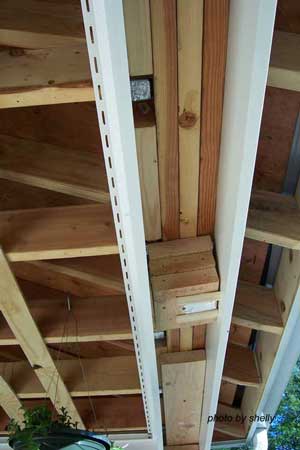
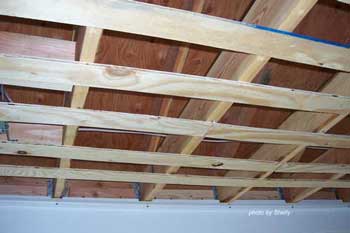
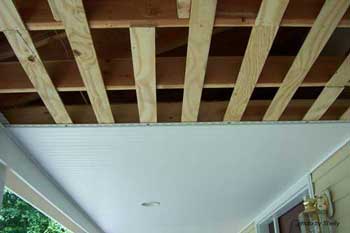
With the help of contractor Eric of Neat Room Construction in County CT, she pulled down the onetime ceiling. They found there was a 1 5/8" sag at one end of the porch and Eric spent a good part of two days leveling the joists. This attention to detail ensures the ceiling volition look fantastic for years to come up.
Sheets of 7/16 plywood were ripped into strips and nailed to the joists. This provides a nailing surface for the half-dozen" wide T2 material in betwixt the sixteen" on-heart joists. Eric then boxed out for recessed ceiling lights.
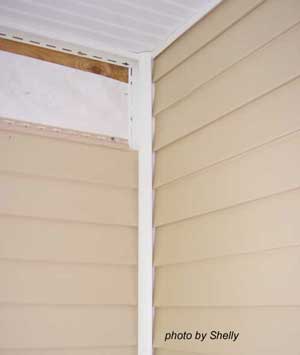
The siding at the garage terminate of the porch was removed and a new corner was installed in place of the J channel the builder had used on the inside corner.
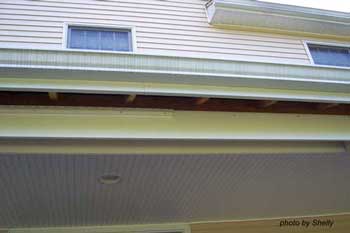
They boxed in the beam using 1x8 Kleer PVC and two" coated exterior screws (predrilled the Kleer to countersink the screws). They pulled the vinyl J-channel that had supported the sometime ceiling off the railing end of the porch and built a false axle to match the front axle.
A J-channel was added all along the new beams, level with the J-aqueduct at the top of the siding.
While Eric worked on the overhang, Shelly began installing the beadboard ceiling which was cut to fit since they weren't all exactly 75" long front to back.
Screwing them in rather than nailing them allowed Shelly to adjust the screws to level the material out so that it fit in the J-channel at the firm and at the new J-channel on the beam without gapping.
It took ii days to install almost 48 ft (96 pieces) of bead board!
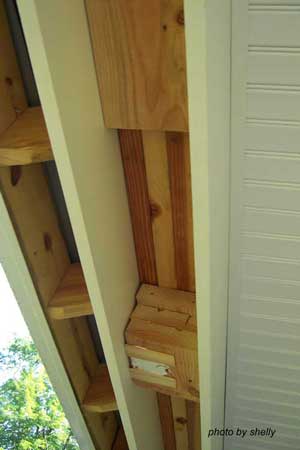
Blocking was installed on the underside of the carrying beam. This was strategically located for Shelly'due south plant hangers (can't forget how this whole project started!) and too immune for nailing surfaces for the Kleer trim boards that course the underside of the beam.
Because the original (triple 2x6) carrying beam had rolled, the blocking had to be shimmed in a few places.

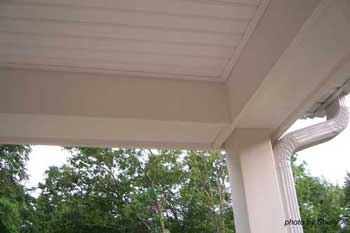
The last iii Kleer boards were cut and ripped to fit between the columns and at the terminate of the porch, and with a trivial help were wedged in between the vertical trim boards.
They checked for the proper reveal earlier nailing them into the blocking with finish nails. J-aqueduct was installed effectually the ends of the beams and the siding was reinstalled. A small slice of PVC on the underside was added because of the reveal.
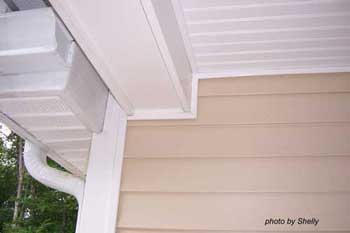
"The underside was run from cavalcade to column, then Eric had to cut small pieces of PVC to fit in front of and behind each of the five columns. Some attention to detail!

Here's the New Ceiling
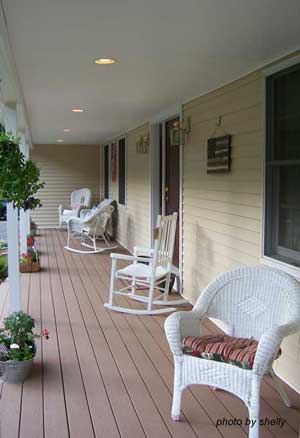
Shelly writes: "Please don't laugh at my poor plants - they had a crude time of it, offset in the garage, then hanging in the rafters of the porch equally nosotros worked effectually them.
I'm still working on the landscaping - and rebuilding the rock walls under the porch that I tore out to put hardware cloth in (another project)".

No laughing hither, Shelly. Your porch and porch ceiling look wonderful and we hope you take fourth dimension to enjoy them.
Our many thanks to yous for sharing your ceiling transformation project with us; we know our site visitors will learn a lot and hopefully exist inspired to tackle such a project themselves!
Advertizement
Shelly's porch was also featured in Domicile Structure Comeback, a site rich with numerous articles nigh popular dwelling house improvement, home construction and home renovation topics.You lot will bask their Home Comeback Articles offering tips to get the best results from your home comeback project.
 This project could non take been completed so well if information technology weren't for Eric of Smashing Room Construction, 765 Cherry Brook Rd. Canton, CT 06059
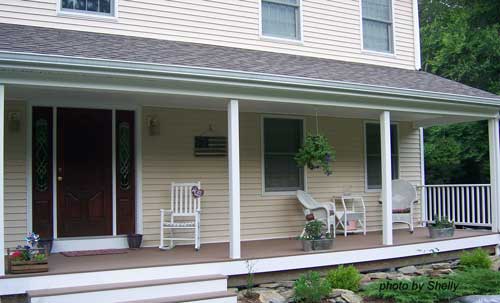
Don't forget to view our other porch ceiling information detailing types of porches and tips for installation! Here are the first pictures of Shelly's vinyl bead board ceiling that she shared with us.
Thank you for taking your time to visit us.

Source: https://www.front-porch-ideas-and-more.com/porch-ceilings.html
Posted by: thomasjamed1983.blogspot.com
0 Response to "How Do You Clean An Aluminum Porch Ceiling?"
Post a Comment